How to Use Optigrid for Accurate PD, Dual PD, and Segment Height Measurements
Optigrid is an innovative tool designed to enhance the accuracy and efficiency of eyeglass prescription measurements directly from patient photos. This step-by-step guide will walk you through the process of using Optigrid to measure Pupillary Distance (PD), Dual PD, and Segment Height (SH), ensuring precise results for custom eyewear orders.
Step 1: Load the Patient Photo
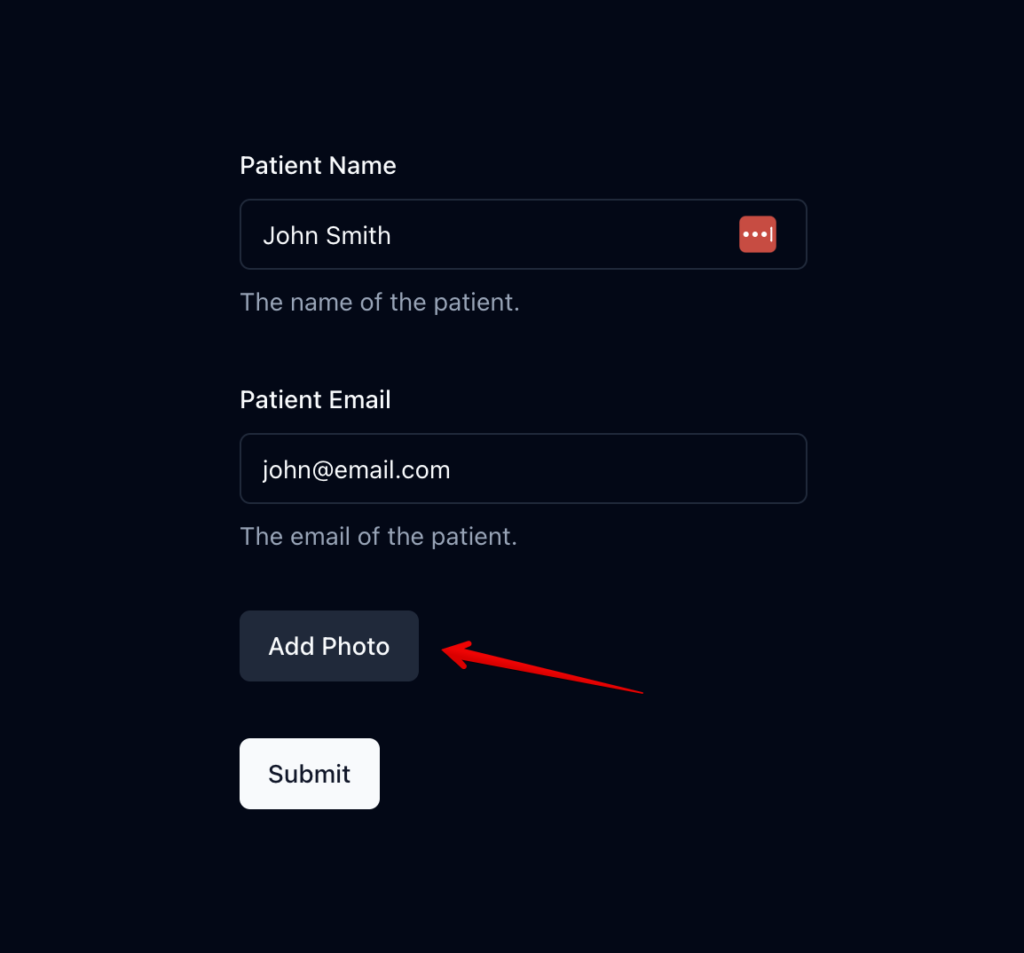
Begin by uploading the patient’s photo into the Optigrid system. Ensure the photo is recent and clearly shows the patient’s face.
Step 2: Evaluate the Photo Quality
For Optigrid to work effectively, the photo must meet certain criteria:
- Distance: The photo should be taken from approximately 1 meter away. This is roughly equivalent to 3.28 feet, ensuring an optimal perspective for measurement.
- Clarity: Ensure the photo is not blurry. A clear image is crucial for precise measurements.
- Orientation: The patient must be looking straight at the camera, with their head neither twisted nor bent. This positioning is essential for accurate alignment during measurements.
Step 3: Choose a Reference
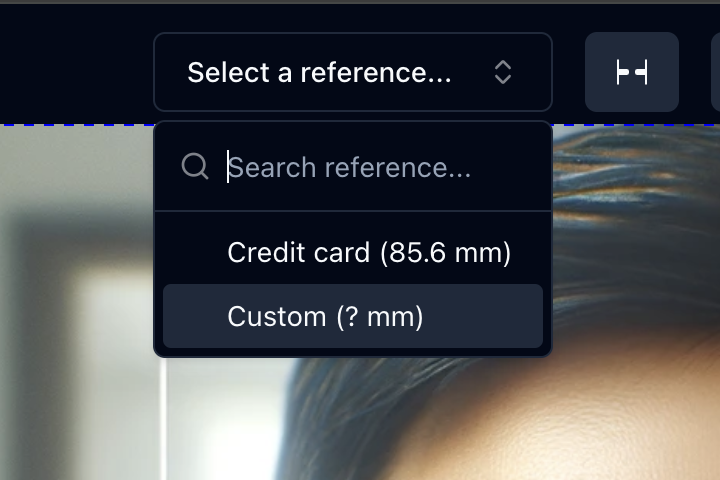
Optigrid allows you to select a reference object to calibrate the measurement scale. You can choose from preconfigured references, such as a credit card size, or use a custom reference by entering its size in millimeters (mm).
Step 4: Mark the Reference Points
Using your mouse, click on the designated points of the reference object within the photo. This calibration step is crucial for ensuring the measurements are scaled correctly.
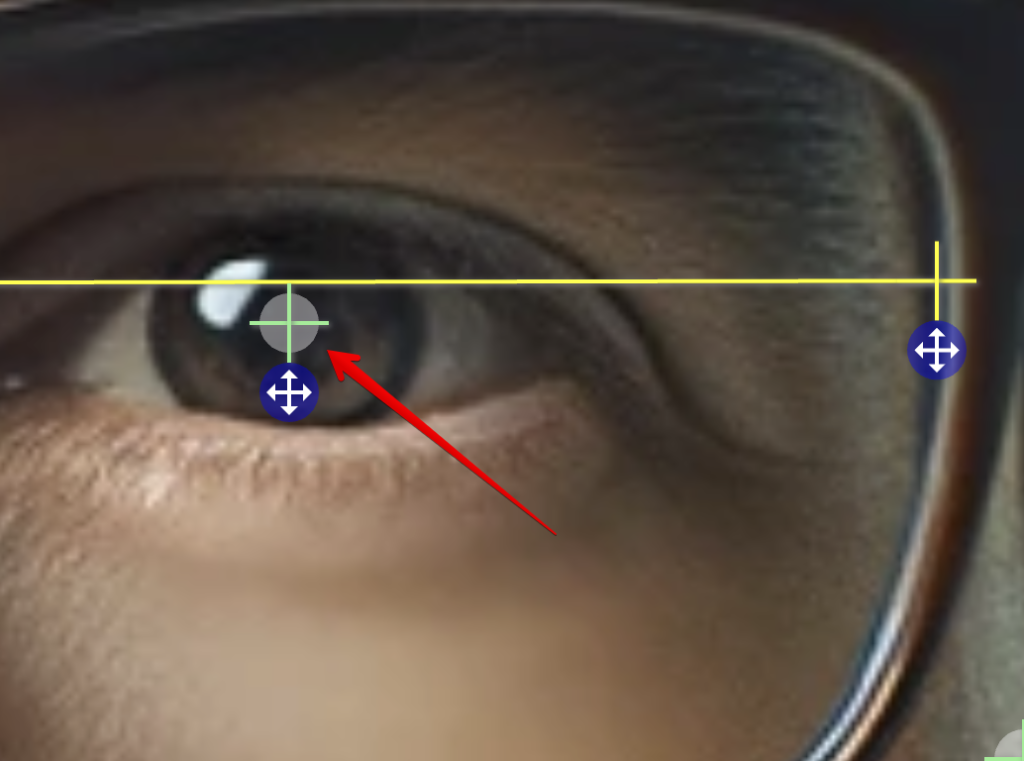
Step 5: Locate the Pupils
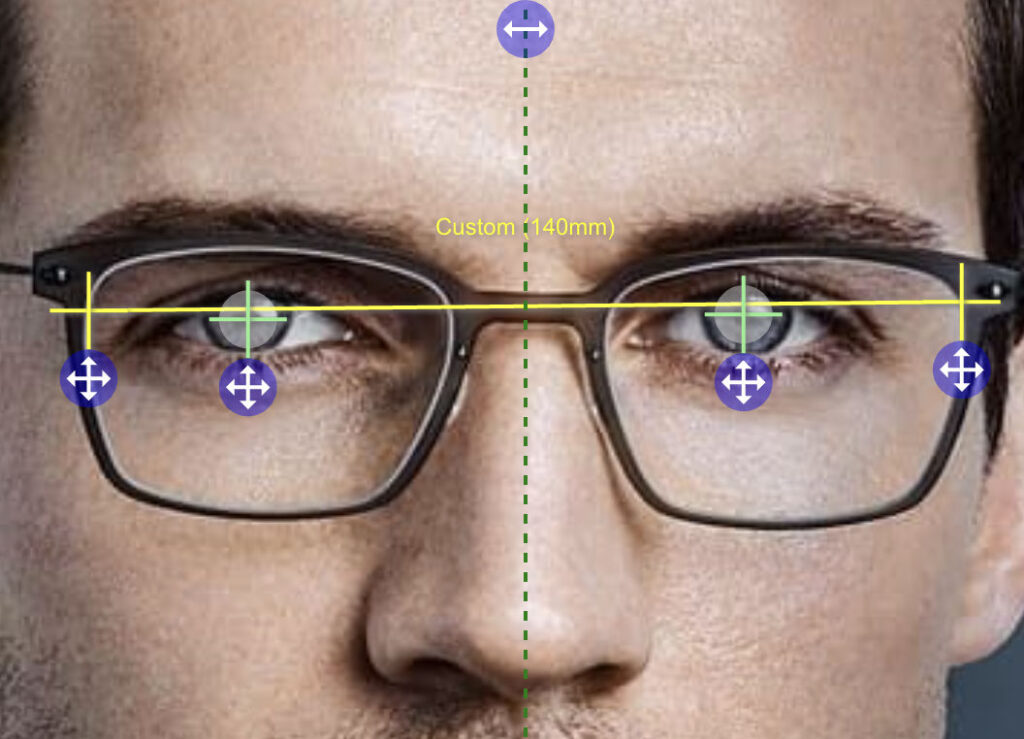
Click the “eye” button in Optigrid, then use the mouse to mark the center of each pupil. Accuracy here is vital, as this determines the PD measurement. You can adjust the crosshair placement if necessary for precision.

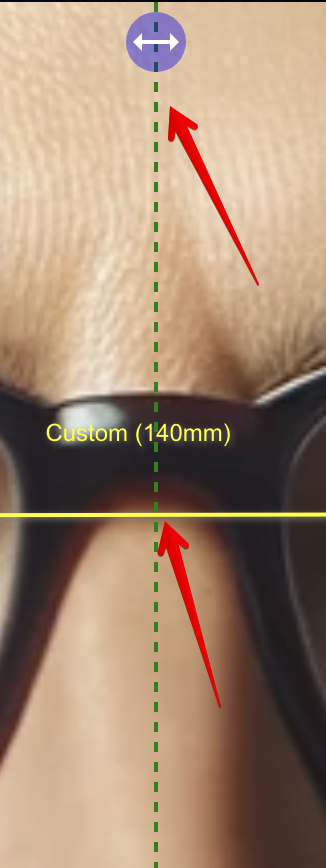
Step 6: Measure Dual PD
Select the “center” button, then position the vertical line precisely in the center of the nasal bone, between the eyes. This step is necessary for measuring Dual PD, which is essential for ensuring lens alignment with the patient’s eyes.

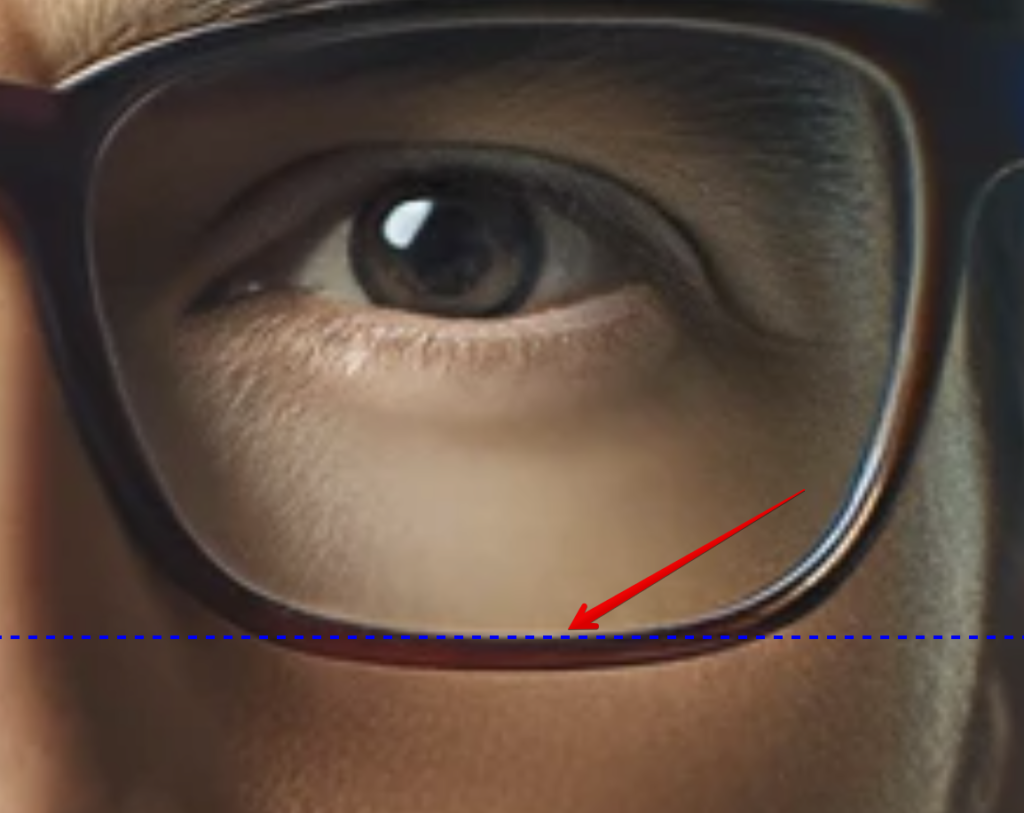
Step 7: Determine Segment Height (SH)
If the patient is wearing their frame in the photo:
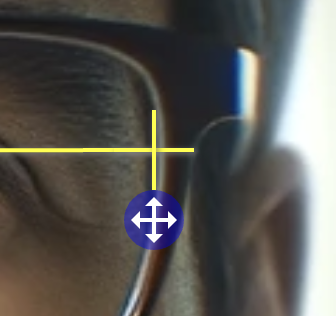
- Click the “base” button.
- Use the mouse to align the horizontal line with the bottom edge of the frame. This action is crucial for measuring the Segment Height (SH), important for multifocal lens placement.

Step 8: Measure PD, Dual PD, and SH
Once all points are correctly set, press the “calculate” button. Optigrid will now compute the PD, Dual PD, and SH based on your inputs.
Step 9: Verification
It’s essential to double-check the measurements provided by Optigrid. Ensure that all reference points were marked accurately and that the calculated values seem consistent with the patient’s needs.
Step 10: Save and Proceed
After verifying the accuracy of the measurements, save them to the patient’s profile. You are now ready to proceed with the eyewear order, equipped with precise measurements for a perfect fit.
Conclusion
Congratulations! You’ve successfully navigated the process of measuring PD, Dual PD, and SH using Optigrid. This tool not only simplifies the measurement process but also enhances the accuracy of eyewear prescriptions, ensuring patients receive the best possible fit for their glasses.
Remember, practice makes perfect. The more you use Optigrid, the more efficient and accurate your measurements will become, leading to satisfied customers and high-quality eyewear.

I am a seasoned software engineer with over two decades of experience and a deep-rooted background in the optical industry, thanks to a family business. Driven by a passion for developing impactful software solutions, I pride myself on being a dedicated problem solver who strives to transform challenges into opportunities for innovation.